Email Forwarding from Your Own Domain to Gmail
Learn how to create an email address on your own domain and forward all emails directly to Gmail using InboxRelay. This step-by-step guide shows you how to set up DNS, MX records, and domain forwarding so you can use Gmail with your custom business email.
TL;DR
Set up a forwarding email from your custom domain to Gmail. Learn how to connect your domain, configure MX records in your DNS settings, create forwarding addresses, and start receiving emails from your domain directly in your Gmail inbox.
Table of Contents
What is Gmail Domain Email Forwarding?
Do you own a custom domain like yourbusiness.com and want to create email addresses for that domain while receiving all messages in your existing personal Gmail inbox? InboxRelay makes this easy.
Create addresses like contact@yourbusiness.com, configure your domain’s DNS settings, and start receiving all emails sent to your custom domain directly in Gmail.
Gmail domain email forwarding lets you:
- Receive emails from your custom domain directly in your existing Gmail inbox
- Use Gmail’s familiar interface without managing a separate email client or mailbox for your domain addresses
- Avoid expensive email hosting no need for Google Workspace or recurring monthly fees
- Keep everything in one place by checking just one inbox instead of juggling multiple accounts
- Use powerful Gmail features like spam filtering, search, and mobile apps
With InboxRelay email forwarding, you can set up a professional email address on your own domain and forward all incoming messages to Gmail, reliably and at no cost.
Prerequisites
Before setting up email forwarding from your custom domain to Gmail, make sure you have the following:
You need a registered domain name (for example, yourbusiness.com) that you want to use for your email addresses. The domain can be registered with any provider such as GoDaddy, Namecheap, Google Domains, or Cloudflare: InboxRelay works with all major registrars.
You also need an active Gmail account where your forwarded emails will be delivered. This can be a personal Gmail address (like yourname@gmail.com) or a Google Workspace mailbox.
Once you have both your domain and your Gmail account ready, you can connect your domain to InboxRelay and start creating professional email addresses that forward directly into your Gmail inbox.
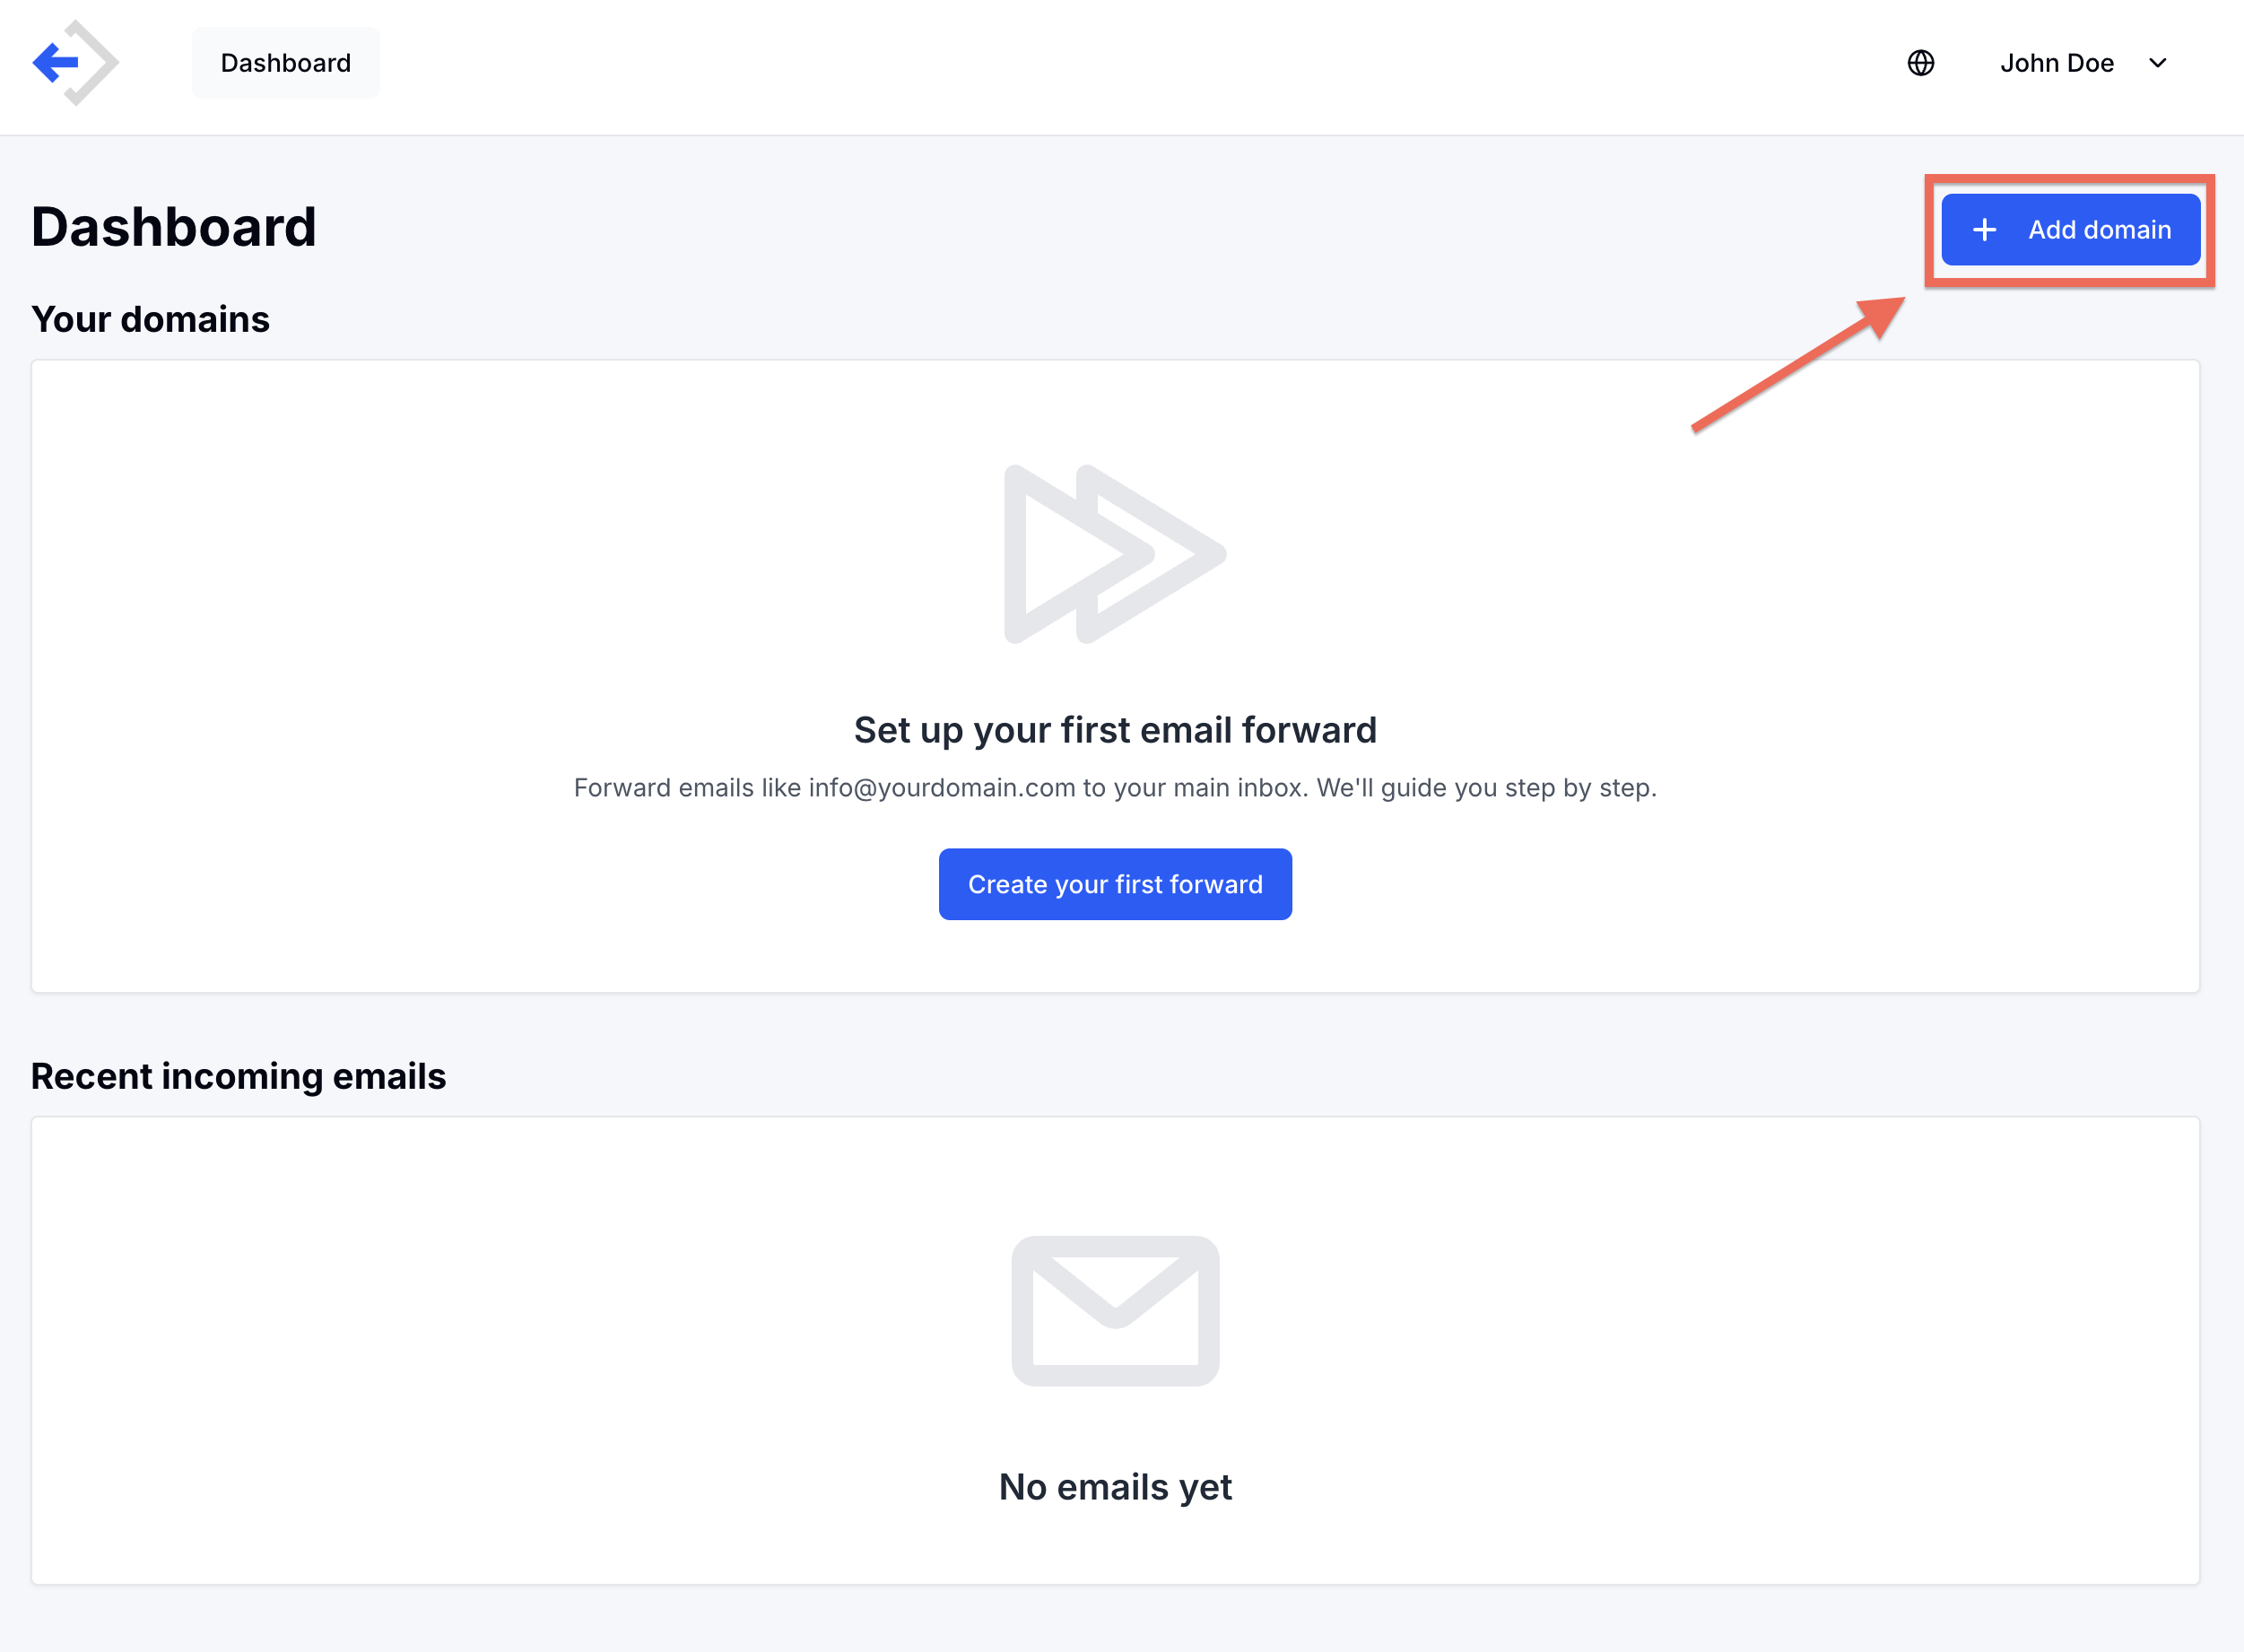
Step 1: Connect Your Domain to InboxRelay
The first step is to add your domain to InboxRelay, which will handle forwarding all incoming emails to your Gmail account.
If you don’t have an account yet, create one here.
After logging in, click the “Add Domain” button to start the setup wizard that connects your custom domain to InboxRelay.
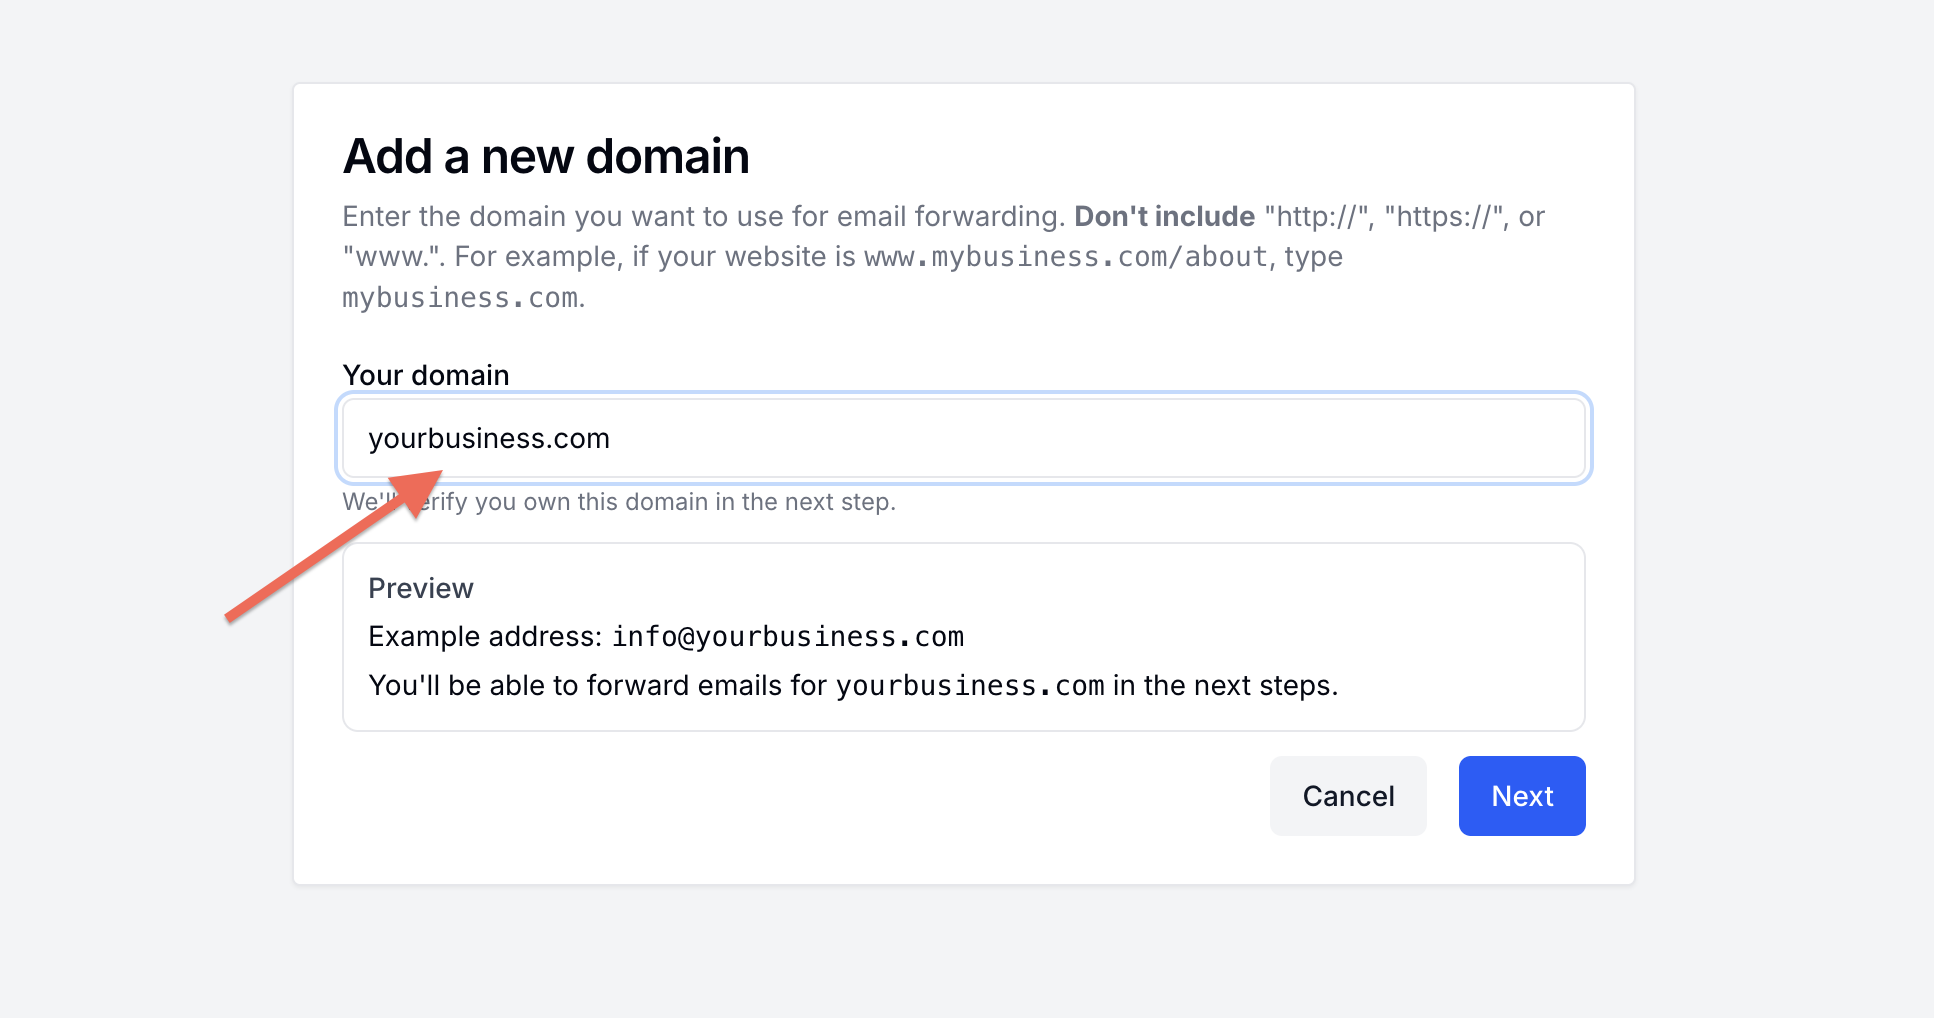
Enter the domain name you want to receive emails for. Make sure you own this domain or have administrative access to its DNS settings. Enter the domain without www or https://.
Next, define the email address you want to create on your domain and the Gmail address where the emails should be delivered.

Enter the email address you want to create on your domain in field 1 (for example, info@yourdomain.com) and your Gmail address in field 2.
Complete the remaining steps of the wizard by verifying that the Gmail address belongs to you. InboxRelay will send a verification PIN to your Gmail inbox, which you need to enter to finish the setup.
Step 2: Update your domain’s DNS settings
To route emails for your domain through InboxRelay, you need to update your domain’s DNS settings.
What is DNS?
DNS (Domain Name System) is the system that tells the internet where different services for your domain are located. For email, the DNS MX record specifies which servers are responsible for receiving emails sent to addresses like info@yourdomain.com. By updating your DNS, or specifically your DNS MX record, you tell the world that InboxRelay should handle all incoming email for your domain.
Log in to the domain registrar or DNS provider where your domain is hosted, find the DNS settings for your domain, and create a new MX record. This record tells all email servers to deliver mail for your domain to InboxRelay.
How to go to the DNS settings sites for the most common domain registrars:
GoDaddy:
- Log in to GoDaddy
- Go to My Products > Domains
- Click DNS next to your domain
Namecheap:
- Log in to Namecheap
- Go to Domain List
- Click Manage > Advanced DNS
Cloudflare:
- Log in to Cloudflare
- Select your domain
- Click the DNS tab
Google Domains:
- Log in to Google Domains
- Select your domain
- Click DNS in the left menu
Create the MX record
Add a new MX record with the following values:
| Setting | Value |
|---|---|
| Host | @ |
| Value | mx01.inboxrelay.io |
| Priority | 10 |
| TTL | 5 minutes or Automatic |
After saving the record, it may take a few minutes (sometimes up to a few hours) for the change to propagate across the internet.
⚠️ Important: Your domain can only have MX records pointing to one email service at a time.
If you see any existing MX records in your DNS settings (they might point to your domain registrar's email service), you need to delete them before adding the InboxRelay MX record.
Verify Email Forwarding
Your email forwarding setup is now complete. All emails sent to your new custom domain address should be delivered to your Gmail inbox.
Before you start using or sharing your new email address, verify that everything works correctly. Send a test email to your new forwarding address (you can even send it from Gmail) and click Send. The message should appear in your Gmail inbox within a few seconds.
Troubleshooting
If the email does not arrive in Gmail, log in to your InboxRelay account and open the Emails tab for your domain. Every message received by InboxRelay is listed there.
If your test email does not appear, one of the following is likely the cause:
-
Incorrect DNS settings
Go back to the DNS settings of your domain at your registrar and verify that the MX record values match exactly what was provided in Step 2. -
DNS propagation delay
DNS changes are not always applied instantly. It can take up to an hour (and sometimes longer) for new MX records to become active. Wait a bit and try sending the test email again.
Conclusion
Congratulations! You've successfully set up email forwarding from your custom domain to Gmail using InboxRelay. You can now:
✅ Receive professional emails at addresses like info@yourbusiness.com in your Gmail inbox
✅ Use Gmail's powerful features and familiar interface
✅ Avoid expensive email hosting costs
✅ Send emails from your custom domain through Gmail
✅ Manage all your emails in one place
Next steps:
- Add more forwarding addresses as your business grows
- Set up Gmail filters to organize emails from different addresses
- Configure additional domains if you manage multiple businesses
- Explore InboxRelay's dashboard to monitor email logs and delivery status
For more guides on email forwarding, DNS configuration, and professional email management, visit our How-To Guides section.
Frequently Asked Questions
Can I use my custom domain with a regular Gmail account?
Yes! You don't need Google Workspace to receive emails from your custom domain in Gmail. With InboxRelay, you can forward all emails from your custom domain (like info@yourbusiness.com) directly to your free personal Gmail account.
How do I send emails from my custom domain through Gmail?
After setting up forwarding, you can configure Gmail's "Send mail as" feature. Go to Gmail Settings > Accounts and Import > Send mail as, then add your custom email address. Gmail will guide you through the verification process.
Will forwarded emails go to my Gmail spam folder?
Initially, some forwarded emails might land in spam. Simply mark them as "Not spam" and move them to your inbox. After doing this once or twice, Gmail will learn to deliver future emails to your inbox automatically.
Do I need to change my current email provider?
No, you keep using Gmail exactly as you do now. InboxRelay simply forwards emails from your custom domain to your existing Gmail address. You don't need to change providers or create new accounts.
How long does it take to set up email forwarding to Gmail?
The setup process takes about 10-15 minutes. After configuring DNS records, propagation usually happens within 1-2 hours, though it can take up to 48 hours in rare cases. Most users start receiving emails within an hour.
Can I forward multiple email addresses to the same Gmail account?
Yes! You can create multiple forwarding addresses (like sales@yourdomain.com, support@yourdomain.com, info@yourdomain.com) and forward them all to your single Gmail account. You can even use catch-all forwarding to receive emails sent to any address at your domain.